Introduction
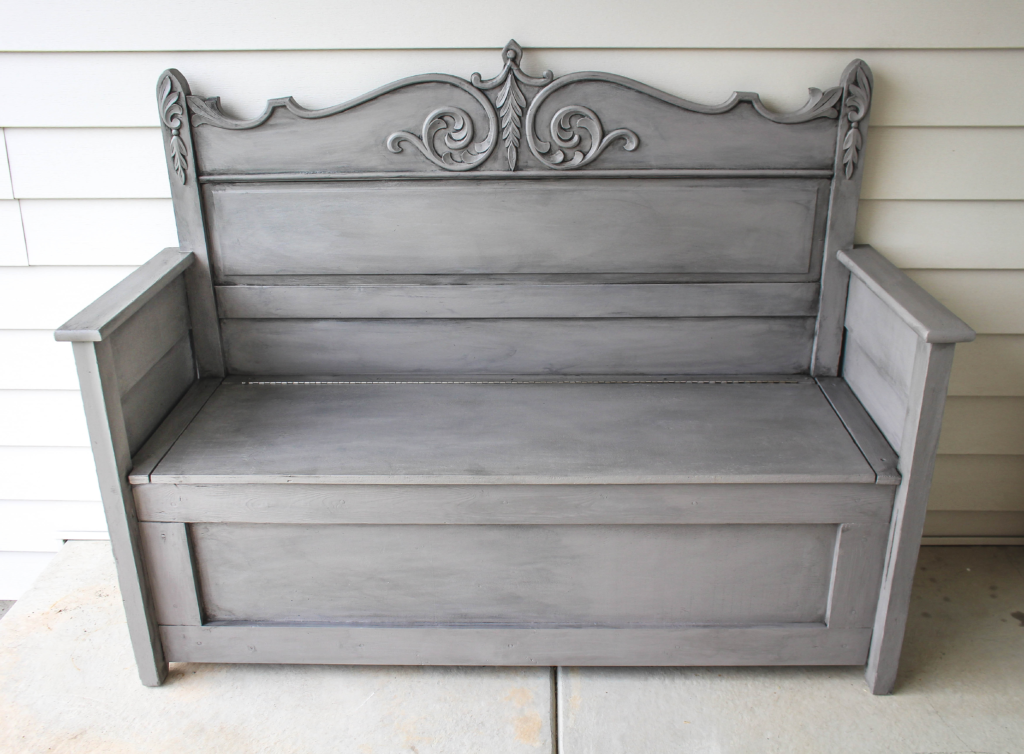
Repurposing old furniture into new and functional pieces not only sparks creativity but also contributes to sustainable living. One delightful DIY project that combines aesthetics and utility is crafting a “Headboard Bench.” Transforming an old headboard into a charming bench is a rewarding venture that allows you to add a personalized touch to your living space while breathing new life into pre-loved furniture.
Materials Needed
Before delving into the step-by-step process, gather the following materials:
- Old Headboard:
- Choose a headboard with a design that appeals to you. Whether it’s a vintage find, a family heirloom, or a thrift store discovery, the possibilities are endless.
- Wood for Seat and Frame:
- Select sturdy wood for the bench seat and frame. Plywood or solid wood boards work well for the seat, while 2x4s are ideal for the frame.
- Saw:
- A saw will be necessary to cut the wood to the desired dimensions. A circular saw or a jigsaw is suitable for this project.
- Sander:
- Smooth out any rough edges on the headboard and the wood pieces with a sander.
- Wood Screws:
- Use wood screws to assemble the frame securely.
- Drill:
- A drill is essential for creating pilot holes and attaching the wood pieces.
- Wood Glue:
- Apply wood glue along with the screws for added strength in the joints.
- Paint or Stain:
- Choose a paint or stain that complements your style and existing décor.
- Foam and Fabric for Cushion (Optional):
- If you want to add a cushion to the bench, get foam and fabric of your choice.
Step-by-Step Guide
Step 1: Prepare the Headboard
- Inspect and Clean:
- Examine the headboard for any damage or loose parts. Clean it thoroughly to prepare it for the transformation.
- Remove Unwanted Elements:
- If the headboard has unnecessary elements like finials or ornamental pieces that hinder the bench’s design, carefully remove them using a saw or screwdriver.
Step 2: Measure and Cut the Wood
- Measure the Headboard:
- Determine the width of the headboard, as this will be the width of your bench.
- Cut the Seat:
- Using the measurements, cut the plywood or solid wood boards to create the bench seat. If you prefer a wider seat, consider adding extra width.
- Cut the Frame:
- Cut 2x4s to create the frame. The length of the frame should match the width of the headboard, and the width should match the depth of the bench seat.
Step 3: Assemble the Frame
- Create the Rectangle:
- Assemble the cut 2x4s to form a rectangular frame. Use wood screws and wood glue to secure the corners.
- Attach the Seat:
- Place the cut plywood or solid wood boards on top of the frame. Secure them with wood screws, ensuring a snug fit.
Step 4: Attach the Headboard
- Center the Headboard:
- Position the headboard at the back of the bench seat, ensuring it is centered.
- Secure the Headboard:
- Attach the headboard to the frame using wood screws. Make sure it is stable and well-aligned.
Step 5: Sand and Finish
- Smooth Edges:
- Use a sander to smooth any rough edges on both the headboard and the bench.
- Apply Paint or Stain:
- Choose a paint or stain color that suits your style. Apply it evenly, allowing it to dry completely between coats.
Step 6: Add Optional Cushion
- Cut Foam:
- If you desire a cushioned seat, cut foam to match the dimensions of the bench seat.
- Wrap in Fabric:
- Cover the foam with fabric, securing it to the bench with a staple gun. Ensure the fabric is taut for a neat finish.
Tips and Ideas
- Personalize with Pillows:
- Enhance the bench’s comfort and aesthetics by adding throw pillows that complement your décor.
- Weatherproofing:
- If the bench is intended for outdoor use, consider using weather-resistant paint or sealant to protect it from the elements.
- Distressing for a Vintage Look:
- If you prefer a vintage or distressed appearance, sand the edges and corners of the bench after painting for a worn-in charm.
- Coordinate with Surroundings:
- Choose colors and finishes that coordinate with the surroundings, ensuring the bench seamlessly integrates into your space.
Conclusion
Building a headboard bench is not just a DIY project; it’s an expression of creativity and a celebration of sustainability. By repurposing an old headboard, you not only contribute to a greener lifestyle but also craft a unique piece of furniture that tells a story.
As you embark on this DIY journey, relish the process of transforming a discarded headboard into a functional and aesthetically pleasing bench. With a touch of craftsmanship and a splash of paint, you can create a charming seat that adds character to your home – a true testament to the beauty of repurposed furniture.
Also read: How Often To Paint House Exterior