Introduction: Understanding the Importance of Regular Oil Changes
Regular oil changes are an essential part of vehicle maintenance. Oil plays a crucial role in lubricating the engine, reducing friction, and preventing wear and tear on the engine components. Over time, oil can become contaminated with dirt, debris, and other impurities, which can reduce its effectiveness and potentially damage the engine. By regularly changing the oil, you can ensure that your vehicle’s engine is running smoothly and efficiently.
In general, a routine oil change typically takes about 30 minutes to an hour.
There are several benefits to regular oil changes. First and foremost, it helps to prolong the life of your engine. Clean oil helps to reduce friction between moving parts, which in turn reduces wear and tear on the engine. This can help prevent costly repairs down the line and extend the overall lifespan of your vehicle.
Regular oil changes also help to improve fuel efficiency. When the engine is properly lubricated, it can operate more efficiently, which means it requires less fuel to run. This can result in significant savings at the pump over time.
Additionally, regular oil changes can help to maintain optimal engine performance. Over time, oil can break down and lose its viscosity, making it less effective at lubricating the engine. By regularly changing the oil, you can ensure that your engine is receiving the proper lubrication it needs to perform at its best.
Step 1: Preparing for the Oil Change
Before you begin an oil change, it’s important to gather all the necessary tools and materials. You will need a wrench or socket set to remove the drain plug and oil filter, an oil filter wrench to remove the old filter, a drain pan to catch the old oil, a funnel to add new oil, and new oil and an oil filter.
Once you have gathered all your tools and materials, you will need to prepare your vehicle for the oil change. Start by parking your vehicle on a level surface and engaging the parking brake. It’s also a good idea to place wheel chocks behind the rear tires to prevent the vehicle from rolling.
Next, pop the hood and locate the oil filler cap. This is usually located on top of the engine and is labeled “oil.” Remove the cap and set it aside. This will help to relieve any pressure in the system and allow the oil to drain more easily.
Step 2: Draining the Old Oil
To drain the old oil, you will need to locate the oil drain plug. This is typically located on the bottom of the engine and is a large bolt or plug. Consult your vehicle’s owner’s manual if you are unsure of its location.
Once you have located the drain plug, place your drain pan underneath it to catch the old oil. Use a wrench or socket set to loosen and remove the drain plug. Be careful as the oil may be hot. Allow the oil to drain completely into the pan.
Once all the oil has drained, replace the drain plug and tighten it securely. Be careful not to overtighten as this can strip the threads.
Step 3: Replacing the Oil Filter
After draining the old oil, it’s time to replace the oil filter. The oil filter is responsible for removing impurities from the oil as it circulates through the engine.
Locate the oil filter, which is typically located near the bottom of the engine. Use an oil filter wrench to loosen and remove the old filter. Be prepared for some oil to spill out when removing the filter, so make sure your drain pan is still in place.
Before installing a new filter, apply a thin layer of clean oil to the rubber gasket on the top of the filter. This will help create a tight seal and make it easier to remove during future oil changes.
Once you have applied oil to the gasket, screw on the new filter by hand until it is snug. Do not overtighten as this can cause damage to the filter or the engine.
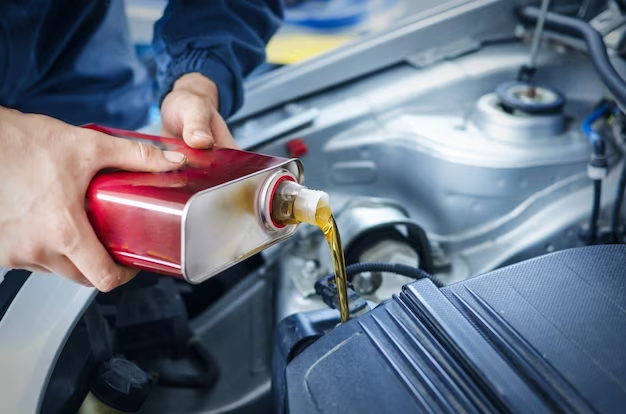
Step 4: Adding New Oil
Now that the old oil has been drained and the new filter has been installed, it’s time to add new oil to the vehicle. Start by consulting your vehicle’s owner’s manual to determine the correct type and amount of oil to use.
Choose the right type of oil for your vehicle based on factors such as the climate you live in and the type of driving you do. There are different types of oil available, such as conventional, synthetic, and high mileage. Each type has its own benefits and is designed for specific types of engines.
Once you have chosen the right type of oil, remove the oil filler cap and place a funnel in the opening. Slowly pour in the new oil, being careful not to overfill. It’s a good idea to add a little less than the recommended amount at first and then check the oil level before adding more.
Step 5: Checking the Oil Level
After adding new oil, it’s important to check the oil level to ensure it is within the recommended range. Start by removing the dipstick, which is usually located near the oil filler cap.
Wipe off any oil from the dipstick with a clean cloth or paper towel. Then reinsert it into the dipstick tube and push it all the way in. Remove it again and check the oil level.
The dipstick will have markings indicating the minimum and maximum levels. The oil level should be between these two marks. If it is below the minimum mark, add more oil until it reaches the proper level.
Step 6: Inspecting Other Fluids and Components
While you’re performing an oil change, it’s a good idea to take the opportunity to check other fluids and components in your vehicle.
Start by checking other fluids such as coolant and brake fluid. Consult your vehicle’s owner’s manual for the location of these fluids and how to check their levels. If any of the fluid levels are low, consult your owner’s manual for the correct type of fluid to use and add as needed.
Next, inspect other components such as belts and hoses. Look for any signs of wear or damage, such as cracks or fraying. If you notice any issues, it’s a good idea to have them replaced before they cause further damage or failure.
Step 7: Cleaning Up and Disposing of Old Oil
After completing the oil change, it’s important to clean up any spills or messes that may have occurred during the process. Use a rag or paper towels to wipe up any oil that may have spilled onto the engine or surrounding areas.
Once you have cleaned up, it’s important to properly dispose of the old oil. Used motor oil is considered hazardous waste and should never be poured down the drain or thrown in the trash. Most auto parts stores and service centers accept used oil for recycling. You can also check with your local recycling center for proper disposal options.
Factors that Affect the Time it Takes to Complete an Oil Change
The time it takes to complete an oil change can vary depending on several factors. One factor is the type of vehicle you have. Some vehicles have easier access to the oil drain plug and filter, while others may require more time and effort to reach them.
Another factor is the type of oil you are using. Synthetic oils tend to flow more easily and can be drained faster than conventional oils. Additionally, some vehicles require more oil than others, which can affect the time it takes to complete an oil change.
The experience level of the person performing the oil change can also affect the time it takes. Someone who is familiar with the process and has performed oil changes before may be able to complete it more quickly than someone who is doing it for the first time.
Conclusion: Maintaining Your Vehicle for Optimal Performance
Regular vehicle maintenance is essential for keeping your vehicle running smoothly and efficiently. Regular oil changes are a crucial part of this maintenance routine and offer several benefits, including prolonging the life of your engine, improving fuel efficiency, and maintaining optimal engine performance.
By following the steps outlined in this article, you can easily perform an oil change on your own. Remember to gather all the necessary tools and materials, prepare your vehicle for the oil change, drain the old oil, replace the oil filter, add new oil, check the oil level, inspect other fluids and components, clean up any spills or messes, and properly dispose of the old oil.
Taking the time to perform regular oil changes will not only save you money on costly repairs but also help to ensure that your vehicle is running at its best. So don’t neglect this important maintenance task and keep your vehicle in optimal condition for years to come.